
Introduction
Soldering is a process that involves joining two or more metal pieces together using a melted filler material, such as tin-lead alloy, lead-free alloy, or silver-based solder. It’s a type of welding that relies on heat and pressure to create a strong bond between two metals. Aluminum is one of the most commonly used metals in soldering projects, but it can be challenging to solder due to its low melting point and tendency to oxidize quickly.
How to Solder Aluminum: A Step-by-Step Guide
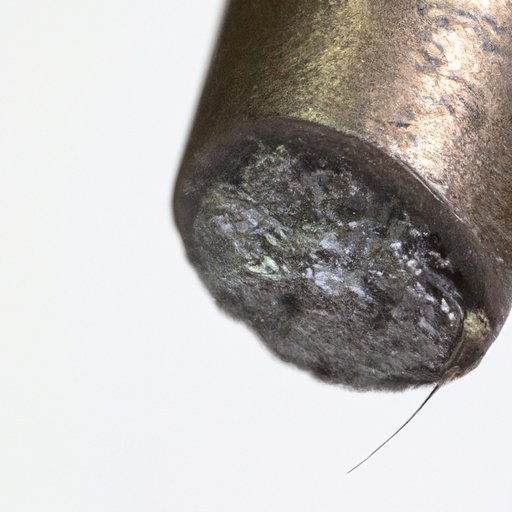
Solder will stick to aluminum, although it takes some practice to get it right. Here are the steps you need to follow for successful soldering of aluminum surfaces:
Preparing the Area
The first step is to make sure the area you’re working on is clean and free of debris. Use a wire brush or steel wool to remove any rust, dirt, or other contaminants from the surface. Once the area is clean, apply flux to the surface. Flux helps prevent oxidation and ensures a better bond between the metals.
Applying the Solder
Once the area is prepped, it’s time to apply the solder. Use a soldering iron or a torch to heat the aluminum and melt the solder. Make sure to keep the heat source moving so that the solder doesn’t pool in one spot and cause weak spots. You may need to add additional solder if the joint isn’t strong enough.
Cooling and Cleaning
Once the solder has cooled, use a wet rag or sponge to clean off any excess flux or solder. This will help ensure a strong bond between the metals. If there are any gaps or weak spots, you may need to repeat the process.

Soldering Aluminum: What You Need to Know
Before you begin soldering aluminum, it’s important to understand the different types of solder that can be used, as well as the necessary tools and equipment. Here’s what you need to know:
Types of Solder Used for Aluminum
When soldering aluminum, it’s important to choose the right type of solder. Tin-lead alloy is the most common type of solder used for aluminum, but lead-free alloys and silver-based solders can also be used. Make sure to use the correct type of solder for the job at hand.
Necessary Tools and Equipment
In addition to the solder, you’ll need a few other tools and equipment to successfully solder aluminum. These include a soldering iron, torch, wire brush, flux, wet rag or sponge, and safety goggles. Make sure to have these items on hand before beginning your project.
Exploring the Advantages and Disadvantages of Soldering Aluminum
Soldering aluminum offers several advantages, but there are also some drawbacks to consider. Here’s a closer look at the pros and cons of soldering aluminum:
Advantages
Soldering aluminum provides a strong bond that won’t corrode over time. It’s also relatively easy to do and doesn’t require special skills or expensive equipment. Plus, soldering aluminum is less time-consuming than other types of welding.
Disadvantages
One of the biggest drawbacks of soldering aluminum is that it requires a lot of heat, which can damage the surface of the aluminum. It’s also difficult to achieve a perfect seal, and improper soldering can result in weak spots. Finally, soldering aluminum takes practice and patience to get it right.
The Basics of Soldering Aluminum for Beginners
If you’re just starting out with soldering aluminum, here are a few tips to help you get started:
Safety Precautions
Always wear safety glasses when soldering aluminum to protect your eyes from flying sparks. Also, make sure to have a fire extinguisher nearby in case of an emergency.
Tips on Getting Started
Start by practicing on scrap pieces of aluminum until you feel comfortable with the process. You may also want to practice with non-aluminum metals, such as copper or brass, to get a feel for the process. Once you’ve mastered basic soldering techniques, you can move on to more complicated projects.
Tips for Soldering Aluminum Successfully
Here are a few tips to help you achieve successful results when soldering aluminum:
Use the Right Temperature
Make sure to use the right temperature for the job. Aluminum melts at a lower temperature than other metals, so it’s important to use a lower temperature setting on your soldering iron. If the temperature is too high, it can damage the aluminum.
Ensure Proper Cleaning
Proper cleaning is essential for a successful soldering job. Use a wire brush or steel wool to remove any dirt, rust, or other contaminants from the surface before applying the flux or solder. This will ensure a strong bond between the metals.
Use Flux
Flux helps prevent oxidation and ensures a better bond between the metals. Make sure to apply the flux before heating the aluminum and melting the solder.

Understanding the Chemical Reactions Behind Soldering Aluminum
Soldering aluminum involves several chemical reactions that occur during the process. Here’s a closer look at the three main chemical reactions that take place when soldering aluminum:
Oxidation
When aluminum is heated, it will naturally oxidize. The flux helps prevent this oxidation and ensures a stronger bond between the metals.
Alloying
When the solder melts, it forms an alloy with the aluminum, creating a strong bond between the two metals. The alloying reaction takes place when the molten solder comes into contact with the aluminum.
Diffusion
The diffusion reaction occurs when the molten solder diffuses into the aluminum, forming a single, uniform structure. This helps ensure a strong bond between the two metals.

Soldering Aluminum: An Overview of Tools and Techniques
There are several different tools and techniques that can be used for soldering aluminum. Here’s a quick overview of the most popular methods:
Torch Soldering
Torch soldering is the traditional method of soldering aluminum. It involves using a torch to heat the aluminum and melt the solder. The torch must be held at a distance from the metal to prevent overheating and damage.
Ultrasonic Soldering
Ultrasonic soldering uses high-frequency vibrations to heat the aluminum and melt the solder. This method is quicker and easier than torch soldering, but it can be more expensive and is not suitable for all projects.
Induction Soldering
Induction soldering uses an induction coil to generate heat and melt the solder. It’s a fast and efficient method, but it requires specialized equipment that can be costly.
Conclusion
Soldering aluminum can be a challenging task, but with the right tools and techniques, it can be done successfully. From understanding the types of solder to be used to exploring the chemical reactions involved, there’s a lot to learn about soldering aluminum. With practice and patience, anyone can master the basics of soldering aluminum.
Summary of Key Points
Soldering aluminum involves several steps, including preparation, application of solder, cooling, and cleaning. Different types of solder can be used for aluminum, and it’s important to choose the right one for the job. There are several advantages and disadvantages to soldering aluminum, so it’s important to weigh both before beginning a project. Safety precautions should always be taken when soldering aluminum, and the right temperature and proper cleaning are essential for successful results.
Final Thoughts
Soldering aluminum can take some practice, but with the right tools, techniques, and patience, anyone can do it. Understanding the basics of soldering aluminum will help ensure that your projects turn out perfectly every time.