
Introduction
Painting aluminum siding is a great way to give your home’s exterior a fresh look. But before you start painting, it’s important to properly prepare the surface so that the paint will adhere correctly. Prepping aluminum siding for paint involves several steps, including cleaning, scraping, sanding, stain removal, priming, and painting. In this article, we’ll provide a step-by-step guide to help you prep your aluminum siding for paint.

Cleaning the Siding with a Pressure Washer
The first step in prepping aluminum siding for paint is to clean it with a pressure washer. This will remove dirt, dust, and other debris that can interfere with the adhesion of the paint. You’ll need a pressure washer with an adjustable nozzle and a detergent attachment. Start by attaching the detergent attachment to the pressure washer and filling it with the appropriate cleaner.
Once the pressure washer is ready, turn it on and adjust the nozzle to the lowest setting. Hold the nozzle about 12 inches away from the siding and move it slowly over the surface. Make sure to cover the entire surface and pay special attention to areas where dirt and debris are likely to accumulate. When you’re finished, rinse the siding thoroughly with water.

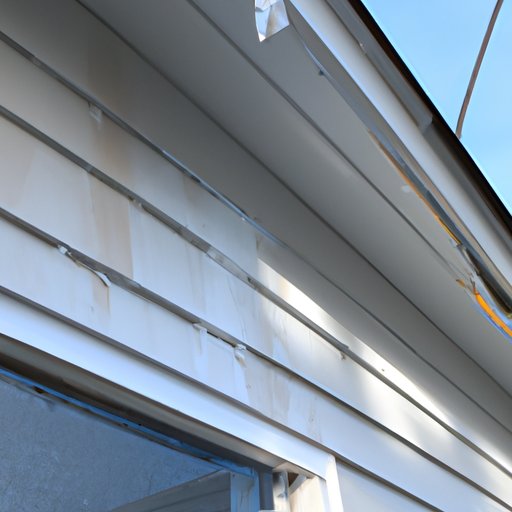
Scraping Away Loose Paint and Debris
Once the siding has been cleaned, you’ll need to scrape away any loose paint or debris. This will help ensure that the new paint adheres properly. You’ll need a putty knife, a wire brush, and a scraper. Start by using the putty knife to scrape away any loose paint or debris. Be careful not to gouge the siding as you work.
Next, use the wire brush to remove any stubborn bits of paint or debris. Finally, use the scraper to remove any remaining debris. When you’re finished, wipe down the siding with a damp cloth to remove any residue.
Sanding Down Rough Spots and Edges
After you’ve scraped away all of the debris, you’ll need to sand down any rough spots or edges. This will help to create a smooth surface for the paint to adhere to. You’ll need a sanding block and some 120-grit sandpaper. Start by wetting the sandpaper with a damp cloth and then sanding the siding in a circular motion. Make sure to cover the entire surface and pay special attention to any rough spots or edges.
When you’re finished, use a damp cloth to wipe away any dust or debris. Then let the siding dry completely before moving on to the next step.
Removing Stains with Vinegar and Water
If there are any stubborn stains on the siding, you can remove them by mixing equal parts vinegar and water. Put the mixture into a spray bottle and spray it onto the stained area. Let the mixture sit for at least 10 minutes before scrubbing it with a soft-bristled brush. Rinse the area with a hose and then let it dry completely.

Rinsing the Siding with a Hose
Once you’ve removed any stains, you’ll need to rinse the siding with a hose. This will help to remove any dust or debris that may have been left behind. Start by rinsing the siding with a regular garden hose. Make sure to cover the entire surface and pay special attention to any areas that may have been missed during the cleaning process.
When you’re finished, let the siding dry completely before moving on to the next step.
Priming the Siding with an Oil-Based Primer
Before you apply the paint, you’ll need to prime the siding with an oil-based primer. This will help to create a strong bond between the siding and the paint. You’ll need an oil-based primer and a paintbrush or roller. Start by applying the primer to the siding in a thin, even layer. Make sure to cover the entire surface and pay special attention to any areas that may have been missed during the cleaning process.
When you’re finished, let the primer dry completely before moving on to the next step.
Applying Exterior Paint to the Siding
Now it’s time to apply the paint. You’ll need an exterior paint and a paintbrush or roller. Start by applying the paint in a thin, even layer. Make sure to cover the entire surface and pay special attention to any areas that may have been missed during the priming process.
When you’re finished, let the paint dry completely before applying a second coat. Once the second coat has dried, you can enjoy your freshly painted aluminum siding.
Conclusion
Prepping aluminum siding for paint is a relatively straightforward process. It involves several steps, including cleaning, scraping, sanding, stain removal, priming, and painting. With the right tools and materials, you can easily and efficiently prep your aluminum siding for paint. Just make sure to take your time and follow each step carefully for the best results.
Finally, remember to always wear safety glasses and gloves when working with chemicals or power tools. This will help to protect you from any potential hazards.