
Introduction
Aluminum is used in a wide variety of applications, from automotive parts to cookware. In order to make these products, the aluminum must first be melted down into an ingot. The process of melting aluminum is relatively straightforward, but it requires precise temperatures and safety precautions in order to achieve the desired results. This article will provide an overview of the process of melting aluminum and explain how to do it safely and efficiently.
Exploring the Process of Melting Aluminum: A Step-by-Step Guide
The process of melting aluminum involves several steps and requires specific materials and tools. Here is a step-by-step guide to melting aluminum:
Gather the materials and tools needed to melt aluminum
First, you will need to gather the materials and tools that are necessary for melting aluminum. This includes a furnace or kiln, a mold, safety equipment such as gloves and goggles, and the aluminum itself. Depending on the type of aluminum you are using, you may also need flux and a thermometer.
Create a safe working environment
Safety is of the utmost importance when melting aluminum. Make sure your workspace is well-ventilated and free from any flammable materials. Wear protective clothing, including gloves and goggles, to protect yourself from hot metal and sparks. Make sure you have a fire extinguisher nearby in case of an emergency.
Set up the melting furnace
Once you have gathered the necessary materials, you can begin setting up the melting furnace. Make sure the furnace is in a stable position and is securely attached to a sturdy surface. Connect the power source to the furnace and ensure that it is properly grounded.
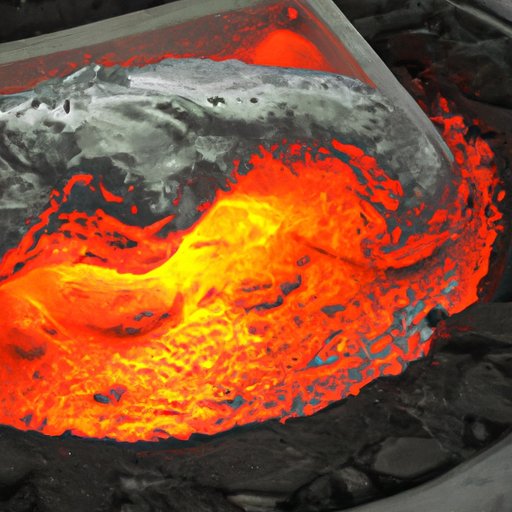
Heat up the aluminum
Once the furnace is set up, you can begin heating the aluminum. Place the aluminum into the furnace and use a thermometer to monitor the temperature. Different types of aluminum require different temperatures, so make sure you know the correct temperature for the type of aluminum you are using.
Pour the melted aluminum into the mold
When the aluminum has reached the correct temperature, it can be poured into a mold. Use tongs to carefully remove the molten aluminum from the furnace and pour it into the mold. Make sure you wear safety equipment to protect yourself from splashes of hot metal.
Cool down the aluminum
Once the aluminum has been poured into the mold, allow it to cool down before attempting to remove it. The cooling process will vary depending on the type of aluminum being used. After the aluminum has cooled, it can be removed from the mold and is ready for use.

How to Melt Aluminum at Home for DIY Projects
If you are looking to melt aluminum for a DIY project, you can do so with common household items. All you need is a heat source, such as a propane torch or an electric stove, a metal container to hold the aluminum, and safety equipment, such as gloves and goggles. Follow the same safety precautions as outlined above, and make sure you select the correct temperature for melting aluminum.

The Benefits and Hazards of Melting Aluminum
Melting aluminum has many advantages. It is a cost-effective way to create custom shapes and sizes, and it allows for a greater degree of precision than other methods of fabrication. However, there are potential hazards associated with melting aluminum, including the risk of serious burns and exposure to toxic fumes.
The Best Way to Achieve an Evenly Melted Aluminum Ingot
In order to achieve an evenly melted aluminum ingot, it is important to select and prepare the aluminum correctly. Start by sorting through the aluminum and removing any impurities. Once the aluminum is clean, place it in the furnace and heat it slowly and evenly. Using a specialized furnace can also help to ensure an even melt. Additionally, make sure you set the temperature correctly for the type of aluminum you are melting.

The Different Temperatures Required for Melting Different Types of Aluminum Alloys
The temperature required for melting aluminum depends on the type of alloy being used. Factors such as the purity of the aluminum and the amount of other metals present can affect the melting temperature. Common aluminum alloys, such as 6061 and 7075, require temperatures of between 1,200 and 1,400 degrees Fahrenheit.
Conclusion
Melting aluminum is a relatively simple process that requires the right materials and tools, as well as safety precautions. This article provides a comprehensive overview of the process of melting aluminum, including information on the materials and tools needed, safety precautions, and temperature requirements for different aluminum alloys. By following the proper steps, you can safely and efficiently melt aluminum for a variety of projects.