
Introduction
Welding aluminum can be an intimidating task, especially if you’re using a torch. But with the right knowledge and tips, you can make your welds look professional and get long-lasting results. This article will provide you with a step-by-step guide on how to weld aluminum with a torch in order to get the best results.

Types of Torches and the Right One to Use for Aluminum
When it comes to welding aluminum, there are three main types of torches that are commonly used: oxy-acetylene, TIG (tungsten inert gas), and MIG (metal inert gas). Each type of torch has its own advantages and disadvantages, so it’s important to choose the right one for your project.
Oxy-Acetylene Torch
The oxy-acetylene torch is the most common type of torch used for welding aluminum. It’s relatively inexpensive and easy to use, but it does require the use of oxygen and acetylene tanks, which can be dangerous if not handled properly. The oxy-acetylene torch is best suited for small projects and repairs.
TIG (Tungsten Inert Gas) Torch
The TIG torch is the most versatile type of torch and can be used for a variety of welding jobs, including aluminum. It uses a tungsten electrode to create an arc that heats the metal, allowing you to fuse the two pieces together. The TIG torch is more expensive than the oxy-acetylene torch, but it offers greater control and precision, making it better suited for larger projects.
MIG (Metal Inert Gas) Torch
The MIG torch is the easiest type of torch to use for welding aluminum. It uses an electric arc to heat the metal, which eliminates the need for gas tanks. The MIG torch is great for large projects because it is quick and easy to use. However, it is more expensive than the other types of torches.

Safety Measures when Welding Aluminum with a Torch
Before beginning any welding project, it’s important to take safety precautions. Welding aluminum with a torch can be dangerous if proper safety measures aren’t taken.
Wearing Protective Gear
When welding aluminum with a torch, you should always wear protective gear such as a welding helmet, gloves, and long-sleeved shirt and pants. This will protect you from sparks and flying debris.
Working in a Well Ventilated Area
It’s also important to work in a well-ventilated area when welding aluminum with a torch. This will help to avoid breathing in toxic fumes that can be created during the welding process.
Taking Precautions with Fire
Finally, you should always take precautions with fire when welding aluminum with a torch. Make sure to have a fire extinguisher nearby in case of an emergency.
Setting Up the Welding Area and Equipment
Once you’ve taken all the necessary safety precautions, you can begin to set up the welding area and equipment. This includes gathering the materials needed, connecting the torch, and preparing the work area.
Preparing the Work Area
The first step is to prepare the work area. You should clear away any combustible materials and make sure that the area is free of debris. You should also make sure to secure the metal pieces you’ll be welding together.
Gathering Materials Needed
Next, you should gather all the materials needed for the project. This includes the torch, filler rods, flux, and any other tools you may need. Be sure to read the instructions on the packaging of each product before using it.
Connecting the Torch
Once all the materials have been gathered, you can connect the torch. Depending on the type of torch you’re using, this may involve connecting hoses and regulators or plugging in an electrical cord. Be sure to follow the manufacturer’s instructions when connecting the torch.

Making the Aluminum Welding Joint
Now that the area is prepared and the equipment is ready, you can begin to make the aluminum welding joint. This involves choosing the right filler rods, preparing the metal, and applying heat and filler material.
Choosing Appropriate Filler Rods
The type of filler rod you use will depend on the type of torch you’re using. For example, if you’re using a TIG torch, you should use aluminum filler rods. If you’re using an oxy-acetylene torch, you can use either steel or aluminum filler rods. Be sure to read the manufacturer’s instructions to ensure you’re using the correct filler rods.
Preparing the Metal for Welding
Before you begin welding, you should clean the metal pieces to be joined. This will help ensure a strong bond between the two pieces. You can use a wire brush or grinding wheel to remove any rust or dirt from the surface of the metal.
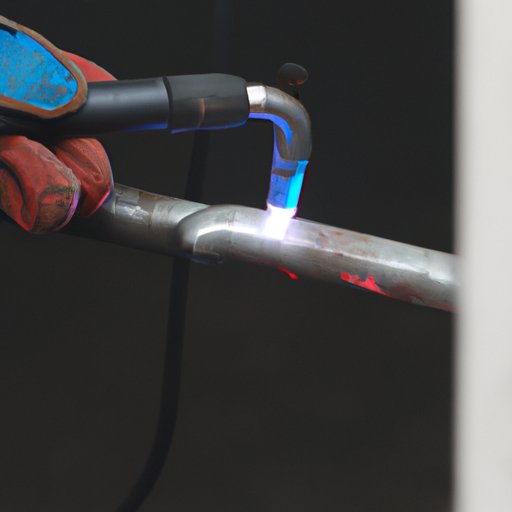
Applying Heat and Filler Material
Once the metal is prepared, you can begin to apply heat and filler material. Start by heating the metal with the torch until it reaches the desired temperature. Then, add the filler rod and move it along the seam of the metal. Make sure to keep the filler rod moving to avoid creating weak spots in the weld.
Finishing the Weld
Once the welding process is complete, you can finish the weld. This includes cleaning up excess material, filing and sanding the joint, and inspecting the joint.
Cleaning Up Excess Material
After the welding process is finished, you should clean up any excess material that has accumulated on the surface of the metal. This can be done with a wire brush or a grinding wheel.
Filing and Sanding the Joint
Once the excess material has been removed, you can file and sand the joint to smooth out any rough edges. This will help to ensure a strong bond between the two pieces of metal.
Inspecting the Joint
Finally, you should inspect the joint to make sure that it is free of defects. Look for any gaps or cracks in the weld and check to make sure that the two pieces of metal are securely fused together.
Conclusion
Welding aluminum with a torch can be a daunting task, but with the right knowledge and tips, you can get professional-looking results. This article provided a step-by-step guide on how to weld aluminum with a torch, from choosing the right torch and safety precautions to setting up the welding area and equipment, applying heat and filler material, and finishing the weld. By following these steps and taking the necessary safety measures, you can achieve successful aluminum welding with a torch.