
Introduction
Staining aluminum can be a great way to give any aluminum surface a unique look that stands out from the crowd. Whether you’re looking to spruce up an old piece of furniture or give your outdoor patio furniture a new look, staining aluminum is a great do-it-yourself project for anyone looking to add a little bit of color and personality to their living space. This article will provide a comprehensive guide on how to stain aluminum, from preparing your work area to troubleshooting tips to keep your aluminum stain looking its best.
Prepare Your Work Area: How to Safely Stain Aluminum
Before you get started on your staining project, it’s important to ensure that your workspace is properly prepared. Staining aluminum can be a hazardous process, so it’s important to take the necessary steps to protect yourself and your surroundings.
Ensure Proper Ventilation
When staining aluminum, it’s important to make sure that you are working in a well-ventilated space. The fumes created by the staining process can be hazardous if inhaled, so it’s important to open any windows and doors to allow the fumes to escape. If possible, consider setting up a fan to help circulate the air.
Wear Protective Gear
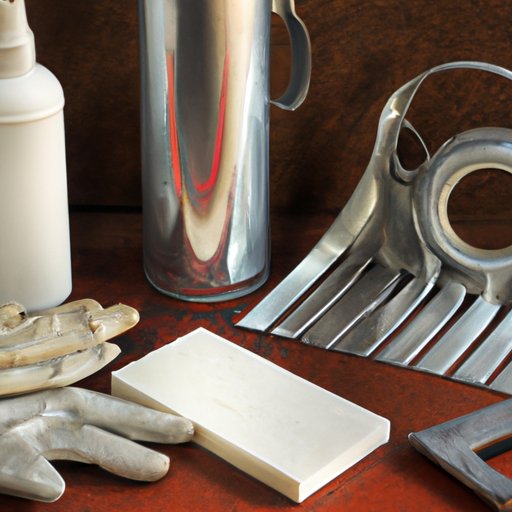
To further protect yourself during the staining process, it’s important to wear the right protective gear. This includes safety goggles, gloves, and a respirator mask. It’s also important to wear long sleeves and pants to protect your skin from contact with the stain.
Gather Necessary Tools
It’s also important to make sure you have all the tools and materials you need for the job. This includes a clean rag, fine-grit sandpaper, paintbrush, and a variety of other tools depending on the type of stain you are using.

Gather the Right Materials for Staining Aluminum
Once your work area is properly prepared, it’s time to gather the materials you will need to stain your aluminum. There are a few key things to consider when choosing the right materials for the job.
Choose the Right Stain
The first step is to choose the right stain for your aluminum. For most projects, an oil-based stain is the best option. Oil-based stains are easy to apply and provide a long-lasting finish. However, there are also water-based stains available that can be used for certain projects.
Choose the Right Clear Coat
After staining your aluminum, it’s important to apply a clear coat to protect the finish. Choose a clear coat that is designed for use on aluminum and follow the manufacturer’s instructions for application.
Other Essential Materials
In addition to the stain and clear coat, you will also need other materials such as soap and water, fine-grit sandpaper, and a clean cloth for wiping away residue.

Clean and Sand Aluminum Before Staining
Before you begin staining, it’s important to clean and sand the aluminum. This will help ensure that the stain adheres properly and provides a smooth, even finish.
Clean with Soap and Water
Begin by cleaning the aluminum with soap and water. Use a sponge or rag to scrub away dirt and debris. Once the aluminum is clean, rinse it off with clean water and allow it to dry completely.
Sand with Fine-Grit Sandpaper
Once the aluminum is dry, it’s time to sand it. Use a fine-grit sandpaper to remove any imperfections or bumps in the surface of the aluminum. Be sure to sand evenly to ensure a smooth finish.
Wipe Away Residue
Finally, use a clean cloth to wipe away any dust or residue from the sanding process. This will help ensure that the stain adheres properly to the aluminum.

Choose a Stain and Apply According to Directions
Now that the aluminum is prepped, it’s time to choose a stain and apply it according to the manufacturer’s instructions.
Read Instructions Carefully
Before you begin, it’s important to read the instructions on the stain carefully. This will help ensure that you apply the stain correctly and achieve the desired results.
Apply Stain in Even Coats
Once you’ve read the instructions, it’s time to begin applying the stain. Use a paintbrush to apply the stain in even coats. Allow the stain to dry between coats and be sure to follow the manufacturer’s instructions for how many coats should be applied.
Allow to Dry Completely
Once you’ve finished applying the stain, allow it to dry completely before moving on to the next step. This will help ensure that the stain adheres properly to the aluminum.
Let the Stain Dry and Apply a Clear Coat
Once the stain has dried, it’s time to apply a clear coat. This will help protect the stain and ensure that it lasts for years to come.
Choose the Right Clear Coat
Just like with the stain, it’s important to choose the right clear coat for your aluminum. Make sure to choose a clear coat that is specifically designed for use on aluminum.
Apply in Even Coats
Once you’ve chosen the right clear coat, it’s time to apply it. Just like with the stain, use a paintbrush to apply the clear coat in even coats. Allow the clear coat to dry between coats and follow the manufacturer’s instructions for how many coats should be applied.
Allow to Dry Completely
Once you’ve finished applying the clear coat, allow it to dry completely before moving on to the next step. This will help ensure that the clear coat adheres properly to the aluminum.

Troubleshooting Tips for Staining Aluminum
Staining aluminum can sometimes be tricky, and it’s not uncommon to run into issues along the way. Here are some common issues and solutions to help you troubleshoot any problems you may encounter.
Common Issues
Some common issues include streaks, uneven coverage, and bubbling. These issues can be caused by applying too much stain or clear coat, not allowing enough time for the stain to dry, or not sanding the aluminum properly before staining.
Solutions to Common Issues
If you encounter any of these issues, the solution is usually fairly simple. Make sure to apply the stain and clear coat in thin, even coats and allow adequate time for each coat to dry. If the issue persists, try sanding the aluminum again and reapplying the stain.
Maintenance Tips for Keeping Aluminum Stain Looking Its Best
Once your aluminum is stained, it’s important to take proper care of it to ensure that it looks its best. Here are some maintenance tips to help you keep your aluminum stain looking its best.
Clean Regularly
Regular cleaning is essential to keeping your aluminum stain looking its best. Use a non-abrasive cleaner and a soft cloth to gently remove dirt and debris from the surface of the aluminum.
Inspect for Damage
It’s also important to inspect the aluminum for damage on a regular basis. Look for signs of rust, scratches, or cracks and repair them as soon as possible.
Reapply Clear Coat as Needed
Finally, it’s important to reapply the clear coat as needed. Over time, the clear coat will start to break down and will need to be replaced. This will help ensure that the aluminum stays protected and that the stain looks its best.
Conclusion
Staining aluminum is a great way to give any aluminum surface a unique look. By following the steps outlined in this article, you can easily and safely stain aluminum to create a beautiful finish. Remember to prepare your work area, gather the right materials, clean and sand the aluminum before staining, apply the stain and clear coat according to the manufacturer’s instructions, and maintain your aluminum stain with regular cleaning and inspections.