
Introduction
Sealing an aluminum boat is an essential part of protecting it from the harsh elements of the ocean. Sealing your boat will help to prevent corrosion, rust, and water damage, and will keep it looking like new for years to come. In this article, we’ll provide a step-by-step guide on how to properly seal an aluminum boat to ensure its longevity.
Research the Best Materials and Tools Needed to Properly Seal an Aluminum Boat
The first step in sealing your aluminum boat is to do some research on the best materials and tools needed to get the job done. You’ll need to identify what type of sealant is best suited for your boat, as there are many types available on the market. Consider the cost of the materials and tools you’ll need, then purchase them from a reputable dealer or online store.

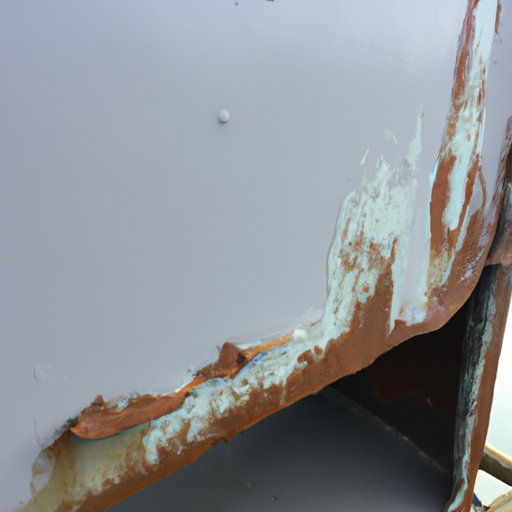
Prepare the Boat for Sealing by Cleaning and Sanding the Surface
Before applying any sealant to your boat, you’ll need to prepare the surface by cleaning and sanding it. Use soap and water to clean the surface of the boat, then use sandpaper to remove any corrosion or rust that may have accumulated on the surface. This will help ensure that the sealant will adhere properly to the boat.

Apply an Inhibitive Primer to Protect the Metal from Corrosion
Once the surface is clean and dry, you can apply an inhibitive primer to the boat. This primer acts as a barrier between the metal and the sealant, and will help to protect the metal from corrosion. Apply a thin coat of primer to the surface of the boat and allow it to fully dry before applying the sealant.
Apply a Quality Marine Grade Sealant to the Hull of the Boat
Once the primer has dried, you can begin applying the sealant to the hull of the boat. Choose a sealant that is recommended for aluminum boats, as some sealants may not be suitable for this type of material. Apply the sealant in even coats, following the manufacturer’s directions. Be sure to spread the sealant evenly over the entire surface of the boat.

Allow the Sealant to Dry Thoroughly and Inspect for Any Leaks or Cracks
Once the sealant is applied, you’ll want to allow it to dry thoroughly before testing for any leaks or cracks. Allow the sealant to dry completely before testing for any weak spots or leaks. If you find any, you’ll need to apply additional sealant to those areas to ensure that the boat is watertight.
Maintain the Sealant Regularly to Keep the Boat Watertight and Protected
Once the sealant has been applied and dried, you’ll need to maintain it regularly to keep the boat watertight and protected. Follow the manufacturer’s instructions for maintenance and repairs, and check the sealed areas regularly for any wear or damage. This will help ensure that your boat remains in good condition for years to come.
Conclusion
Sealing an aluminum boat is an important step in protecting and maintaining it for years to come. By following the steps outlined above, you can ensure that your boat is properly sealed and ready for the open waters. Sealing your boat will help to prevent corrosion, rust, and water damage, and will keep it looking like new for years to come.