
Introduction
Aluminum siding is one of the most popular materials used for home exteriors. It offers a low-maintenance option that’s durable and resistant to weather damage. While aluminum siding is a great choice for many homes, it can still become damaged over time due to wear and tear or extreme weather conditions. Fortunately, repairing aluminum siding is relatively simple and can be done as a DIY project.
This article will provide an overview of aluminum siding and a step-by-step guide to repairing it. We’ll also discuss some DIY tips and cost-effective solutions for fixing damaged siding, as well as how to patch and paint aluminum siding. Finally, we’ll go over the steps for troubleshooting common problems with aluminum siding.
Step-by-Step Guide to Repairing Aluminum Siding
Before beginning any repairs, make sure you have all the necessary tools and materials on hand. You’ll need a utility knife, tin snips, caulking gun, and drill with screwdriver bit. Additionally, you’ll need replacement siding, caulk, primer, and paint.
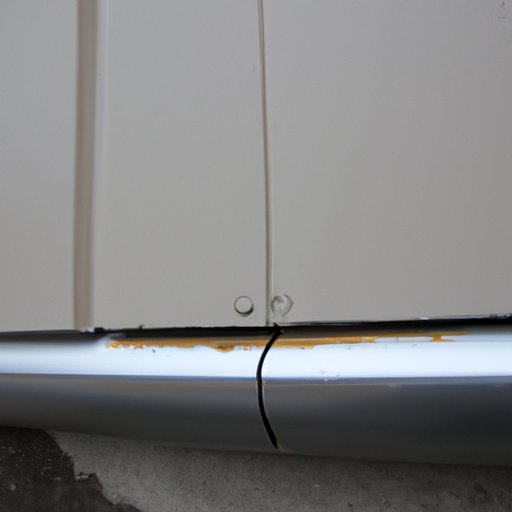
Once you have everything you need, start by identifying the problem area. If you’re dealing with a large section of damaged siding, you may need to remove the entire piece. To do this, use a utility knife to cut away the damaged section. Be careful not to damage the surrounding siding.
Next, cut a new piece of siding to fit the space. Measure the opening carefully and use tin snips to cut the siding to size. Make sure the new piece fits snugly into the opening before proceeding.
Now it’s time to install the new siding. Start by drilling pilot holes along the edges of the siding. Then use self-tapping screws to secure the new piece in place. Finally, apply caulk around the edges of the siding to seal any gaps.

DIY Tips for Fixing Damaged Aluminum Siding
When patching small areas of damaged siding, it’s important to use a special adhesive designed for use on aluminum. This will ensure a strong bond between the patch and the existing siding. Additionally, after applying the patch, be sure to sand the area with fine-grit sandpaper to create a smooth finish.
Finally, don’t forget to prime and paint the patch. This will help protect it from future damage and ensure a seamless look.
How to Patch and Paint Aluminum Siding
Before you begin patching and painting aluminum siding, it’s important to thoroughly clean the area. Use a power washer or a solution of warm water and mild soap to remove dirt and debris. Once the area is clean, you can proceed with the patching process.
Start by applying the patch to the damaged area. Make sure the patch is firmly in place before moving on to the next step. Then use fine-grit sandpaper to sand the patch area until it’s smooth. Finally, prime and paint the patch to match the existing siding.
Cost-Effective Solutions for Aluminum Siding Repairs
If you’re looking for a more cost-effective solution for repairing aluminum siding, consider using a patch kit. These kits are designed to allow you to quickly and easily patch up small areas of damaged siding. They come with everything you need to get the job done.
Another way to save money on aluminum siding repairs is to seal any gaps or cracks with caulk. Caulk is a great way to fill in small spaces and prevent moisture from entering. Additionally, you can use a power washer to clean the siding instead of buying cleaning solutions.

Repairing Dents and Cracks in Aluminum Siding
Dents and cracks in aluminum siding can be repaired using epoxy putty. First, make sure the area is clean and free of dirt and debris. Then, fill the dent or crack with the epoxy putty. After it has dried, sand the area until it’s smooth.

Troubleshooting Common Problems with Aluminum Siding
To ensure your aluminum siding remains in good condition, it’s important to regularly inspect it for any signs of damage. Look for loose or missing fasteners, signs of damage from insects, and signs of corrosion or rust.
If you notice any of these issues, it’s important to address them right away. Depending on the severity of the damage, you may need to replace the affected piece of siding or simply repair it.
Conclusion
Repairing aluminum siding is a relatively simple process that can be done as a DIY project. In this article, we provided a step-by-step guide to repairing aluminum siding, as well as some DIY tips and cost-effective solutions. We also discussed how to patch and paint aluminum siding, and how to repair dents and cracks in aluminum siding.
Finally, we went over the steps for troubleshooting common problems with aluminum siding. Remember to follow safety precautions when handling tools and to regularly inspect your siding for any signs of damage.