
Introduction
Aluminum siding is a popular choice for many homeowners looking to protect their homes from the elements. It’s durable, low maintenance, and relatively inexpensive compared to other siding materials. But like any material, it can become damaged over time. This is where patching comes in. Patching aluminum siding can help restore its appearance and extend its life. In this article, we’ll explore how to patch aluminum siding and provide a step-by-step guide for a successful repair.
Overview of Aluminum Siding
Aluminum siding is a type of metal cladding that is used to cover the exterior walls of a house. It is often made from recycled aluminum, which makes it an eco-friendly option. Aluminum siding is available in a variety of colors, textures, and styles. It is lightweight, durable, and easy to install. Additionally, aluminum siding is resistant to moisture and fire, making it a great choice for those who live in areas with extreme weather conditions.

Benefits of Patching Aluminum Siding
Patching aluminum siding can help restore its appearance and extend its life. It can also prevent further damage from occurring by preventing moisture from seeping into the wall or allowing insects to enter. Additionally, patching aluminum siding can help improve the energy efficiency of your home by preventing drafts from entering. Finally, patching aluminum siding can help maintain the overall value of your home.
Step-by-Step Guide to Patching Aluminum Siding
Patching aluminum siding is not a difficult task, but it does require careful preparation and attention to detail. Here is a step-by-step guide to patching aluminum siding:
1. Preparing the Area to be Patched
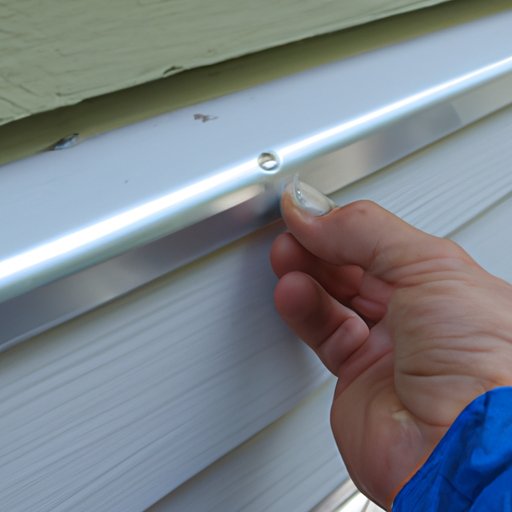
The first step in patching aluminum siding is to prepare the area. This involves cleaning the surface and removing any loose material. Use a putty knife to scrape away any dirt or debris, then use a wire brush to remove any rust or corrosion. Once the area is clean, use a damp cloth to wipe away any dust or dirt.
2. Cutting and Shaping the Patch
Next, measure the area to be patched and cut a piece of aluminum siding that is slightly larger than the area. Use tin snips or a hacksaw to cut the siding, then use a file or sandpaper to smooth the edges. If necessary, use a hammer or mallet to shape the siding to fit the area.
3. Applying the Patch
Once the patch is cut and shaped, it’s time to apply it. Start by applying a thin layer of adhesive to the back of the patch. Use a putty knife to spread the adhesive evenly. Then press the patch firmly against the wall and hold it in place for a few minutes. Allow the adhesive to dry completely before proceeding.
4. Finishing the Repair
Once the patch has been applied, it’s time to finish the repair. Use a caulking gun to apply a bead of caulk around the edges of the patch to seal it in place. Allow the caulk to dry completely before painting the patch to match the surrounding siding. Finally, use a putty knife to smooth any rough spots or uneven edges.

How to Repair Aluminum Siding: A DIY Guide
Repairing aluminum siding is a task that many homeowners can do on their own. However, it’s important to have the right tools and supplies for the job. Here are some tips for successful repairs:
1. Choosing the Right Tools for the Job
When repairing aluminum siding, it’s important to have the right tools. You’ll need a putty knife, wire brush, tin snips, hacksaw, file, sandpaper, hammer or mallet, damp cloth, caulking gun, and paintbrush. You may also need a ladder if the patch is located in an area that is difficult to reach.
2. Understanding the Basics of Patching Aluminum Siding
Before beginning any repair project, it’s important to understand the basics. Make sure you know the types of aluminum siding available and how to prepare the area for patching. Additionally, familiarize yourself with the different materials and tools needed for the job.
3. Tips for Successful Repairs
When patching aluminum siding, it’s important to take your time and work carefully. Make sure to read and follow all instructions carefully. Also, make sure to use the correct type of adhesive and caulk for the job. Finally, be sure to wear safety glasses when working with sharp tools.

The Basics of Patching Aluminum Siding
Patching aluminum siding is a relatively simple process. It involves preparing the area, cutting and shaping the patch, applying the patch, and finishing the repair. Here are the basics of patching aluminum siding:
1. Types of Aluminum Siding
Aluminum siding is available in a variety of shapes and sizes. The most common types are panel siding, lap siding, and shingle siding. Panel siding is the most common type and is typically sold in sheets or panels. Lap siding is installed in overlapping sections and is available in both vertical and horizontal forms. Shingle siding is installed in overlapping layers and is available in a variety of colors and textures.
2. Preparing the Area for Patching
Before patching aluminum siding, it’s important to prepare the area. This involves cleaning the surface and removing any loose material. Use a putty knife to scrape away any dirt or debris, then use a wire brush to remove any rust or corrosion. Once the area is clean, use a damp cloth to wipe away any dust or dirt.
3. Choosing the Right Materials
When patching aluminum siding, it’s important to choose the right materials. Make sure to use a quality adhesive and caulk that is designed specifically for aluminum siding. Additionally, use paint that is designed to adhere to aluminum siding and is rated for the climate in which you live.
How to Make Quick, Easy Repairs to Aluminum Siding
Making quick and easy repairs to aluminum siding is possible with the right tools and materials. Here’s what you need to know:
1. Identifying the Problem
The first step in repairing aluminum siding is to identify the problem. Look for signs of damage such as cracks, dents, or holes. If the damage is minor, a patch should be sufficient. If the damage is more extensive, you may need to replace the entire section of siding.
2. Making the Repairs
Once the problem has been identified, it’s time to make the repairs. Begin by measuring the area to be patched and cutting a piece of aluminum siding that is slightly larger than the area. Apply a thin layer of adhesive to the back of the patch, then press it firmly against the wall. Allow the adhesive to dry completely before proceeding.
3. Sealing and Protecting the Repaired Area
Once the patch is in place, it’s important to seal and protect it. Use a caulking gun to apply a bead of caulk around the edges of the patch. Allow the caulk to dry completely before painting the patch to match the surrounding siding. Finally, use a putty knife to smooth any rough spots or uneven edges.
Get the Look You Want: Patching Aluminum Siding
Patching aluminum siding can help you achieve the look you want for your home. Here are some tips for getting the desired look:
1. Achieving the Desired Look
When patching aluminum siding, it’s important to choose the right materials and tools. Make sure to use a quality adhesive and caulk that is designed specifically for aluminum siding. Additionally, use paint that is designed to adhere to aluminum siding and is rated for the climate in which you live.
2. Matching the Existing Siding
When patching aluminum siding, it’s important to match the existing siding as closely as possible. Take a sample of the existing siding to a local home improvement store to find a match. If no exact match is available, choose a color that is similar in tone and texture.
3. Adding a Decorative Touch
If desired, you can add a decorative touch to your patch. Consider using a stencil or decal to create a custom design. Additionally, you can use a specialty paint to create a unique texture or pattern. Be sure to use a paint that is designed for aluminum siding and rated for the climate in which you live.
A Beginner’s Guide to Patching Aluminum Siding
Patching aluminum siding is not a difficult task, but it does require careful preparation and attention to detail. Here is a beginner’s guide to patching aluminum siding:
1. Gather the Necessary Supplies
The first step in patching aluminum siding is to gather the necessary supplies. You’ll need a putty knife, wire brush, tin snips, hacksaw, file, sandpaper, hammer or mallet, damp cloth, caulking gun, and paintbrush. You may also need a ladder if the patch is located in an area that is difficult to reach.
2. Understand the Process
Before beginning any repair project, it’s important to understand the process. Make sure you know the types of aluminum siding available and how to prepare the area for patching. Additionally, familiarize yourself with the different materials and tools needed for the job.
3. Prepare the Area
Once you’ve gathered the necessary supplies and understand the process, it’s time to prepare the area. This involves cleaning the surface and removing any loose material. Use a putty knife to scrape away any dirt or debris, then use a wire brush to remove any rust or corrosion. Once the area is clean, use a damp cloth to wipe away any dust or dirt.
4. Apply the Patch
Once the area is prepared, it’s time to apply the patch. Start by applying a thin layer of adhesive to the back of the patch. Use a putty knife to spread the adhesive evenly. Then press the patch firmly against the wall and hold it in place for a few minutes. Allow the adhesive to dry completely before proceeding.
5. Finish the Repair
Once the patch has been applied, it’s time to finish the repair. Use a caulking gun to apply a bead of caulk around the edges of the patch to seal it in place. Allow the caulk to dry completely before painting the patch to match the surrounding siding. Finally, use a putty knife to smooth any rough spots or uneven edges.
Patching Aluminum Siding? Here’s What You Need to Know
Patching aluminum siding is a task that many homeowners can do on their own. However, it’s important to have the right knowledge and supplies for the job. Here are some questions to consider:
1. Do I Need a Professional?
In most cases, patching aluminum siding is a task that can be done without the assistance of a professional. However, if the damage is extensive or you are unsure about the process, it is best to seek the help of a qualified contractor.
2. What is the Best Way to Patch Aluminum Siding?
The best way to patch aluminum siding is to use a quality adhesive and caulk that is designed specifically for aluminum siding. Additionally, use paint that is designed to adhere to aluminum siding and is rated for the climate in which you live.
3. What are the Common Challenges When Patching Aluminum Siding?
The most common challenge when patching aluminum siding is matching the existing siding. It is important to find a color that is similar in tone and texture to the existing siding. Additionally, it is important to use the correct type of adhesive and caulk for the job.
4. What Safety Precautions Should I Take When Patching Aluminum Siding?
When patching aluminum siding, it’s important to take safety precautions. Wear safety glasses when working with sharp tools. Additionally, use a ladder if the patch is located in an area that is difficult to reach. Finally, keep children and pets away from the area while working.
Conclusion
Patching aluminum siding is a task that many homeowners can do on their own. It involves preparing the area, cutting and shaping the patch, applying the patch, and finishing the repair. To get the desired look, it’s important to choose the right materials and tools. Additionally, it’s important to take safety precautions when patching aluminum siding. With the right knowledge and supplies, anyone can successfully patch aluminum siding.