
Introduction
Painting on aluminum is a craft that requires special attention and care in order to achieve the desired results. It can be a great way to give a unique, personalized touch to your projects, from home décor to artwork. Before beginning, it’s important to understand the basics of painting on aluminum, as well as the different techniques and materials available. This guide will cover all of the necessary steps for painting on aluminum, from preparation to finishing touches, as well as tips for working with specialty paints.

Overview of Painting on Aluminum
Painting on aluminum can be a rewarding experience if done properly. The process involves several steps, including cleaning, priming, painting, sealing and protecting the surface. Different types of paints and tools can be used to create a variety of effects, from simple brushstrokes to intricate patterns and textures. With the right knowledge and supplies, anyone can create beautiful and durable art on aluminum.
Benefits of Painting on Aluminum
Aluminum is a popular choice for painting because of its durability, versatility, and affordability. It is resistant to rust and corrosion, so it will last longer than other materials. Aluminum is also lightweight and easy to work with, making it ideal for both large and small projects. Additionally, aluminum is non-porous, meaning that it won’t absorb the paint, making it easier to achieve even coverage.

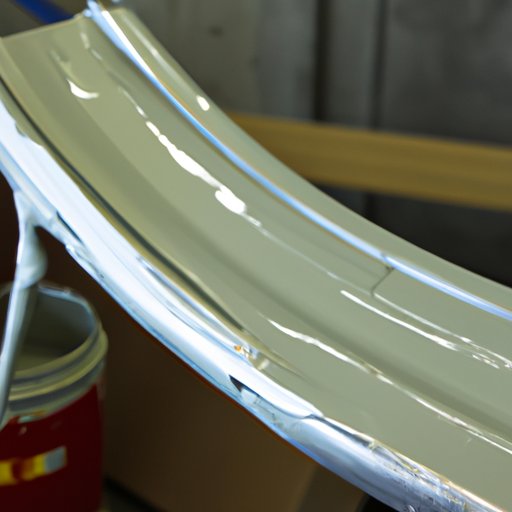
Preparing the Aluminum: Cleaning and Priming
The first step in painting on aluminum is to prepare the surface by cleaning and priming. This will ensure a smooth, even finish and help the paint adhere better. To begin, any rust or debris should be removed using steel wool or sandpaper. Next, an appropriate primer should be applied to the aluminum. This will provide a base layer for the paint to stick to and help protect the metal from corrosion.
Selecting the Right Paint and Tools for Painting on Aluminum
Once the aluminum is prepared, it’s time to select the right paint and tools for the job. There are many types of paints available, such as oil-based, water-based, and enamel. Each type has its own advantages and disadvantages, so it’s important to choose the one that best suits your needs. Additionally, there are several tools that can be used for painting on aluminum, such as brushes, rollers, and sprayers.
Techniques for Applying Paint to Aluminum
Once you have the right supplies, it’s time to start painting. Depending on the desired effect, there are several techniques that can be used, such as brushstrokes, blending, spraying, stencils, and stamping. When using a brush or roller, be sure to apply even strokes and allow each coat to dry before adding another. When spraying, hold the can at least 12 inches away from the surface and move in a steady, circular motion for even coverage.
Creating Textures and Patterns on Aluminum
If you want to add extra detail to your artwork, there are several methods for creating textures and patterns on aluminum. Embossing and etching are two popular techniques that can be used to create interesting designs. Ink can also be used to add fine details and highlights. These techniques require some practice to master, but they can add a unique touch to your artwork.

Finishing Touches: Sealing and Protecting Your Artwork
After the painting is complete, it’s important to seal and protect the surface. The right sealant will help preserve the artwork and prevent fading or cracking. There are several types of sealants available, so it’s important to choose one that is compatible with the type of paint used. Once the sealant is applied, the artwork should be allowed to dry completely before being displayed or handled.
Tips for Working with Specialty Paints on Aluminum
When working with specialty paints, such as acrylics and enamels, there are a few things to keep in mind. Acrylics are best applied with a brush or roller, while enamels should be sprayed on in thin layers. Both types of paints can be blended and layered to create interesting effects. It’s important to follow the manufacturer’s instructions when using specialty paints.

Troubleshooting Common Problems When Painting on Aluminum
As with any painting project, there may be some issues that arise. Common problems include cracking and peeling, blistering and bubbling. If these occur, it’s important to take corrective action immediately. Sanding the area and applying a new layer of paint may be necessary. It’s also important to use the right type of paint and primer for the job.
Conclusion
Painting on aluminum can be a fun and rewarding experience. With the right supplies and techniques, anyone can create beautiful and durable art. Preparing the aluminum is key to achieving the desired results, and there are many methods for adding texture and detail. Sealing and protecting the artwork is also essential for preserving it. With patience and practice, anyone can learn how to paint on aluminum.