
Introduction
Painting aluminum rims can make your car stand out from the crowd and give it an updated, refreshed look. But before you rush out and buy a can of paint, there are a few steps you should take to ensure that your project turns out as expected. This article will provide a step-by-step guide to painting aluminum rims, along with tips and tricks to help you achieve a professional finish.
Step-by-Step Guide to Painting Aluminum Rims
Painting aluminum rims involves several steps, including surface preparation, choosing the right type of paint, and applying the paint in thin coats. Here’s a look at each step in detail.
Preparation
Before you start painting, you need to prepare the surface of the rim. The following steps will help ensure that the paint adheres properly and lasts for years.
Cleaning the Surface
The first step is to clean the surface of the rim. Start by using a degreaser to remove any dirt, grease, or grime. Then use a scrub brush and soapy water to remove any remaining residue. Once the surface is clean, rinse it off with a hose and let it dry completely.
Sanding the Surface
Once the surface is clean and dry, you’ll need to sand the rim. Use a fine-grit sandpaper to remove any imperfections or blemishes on the surface. Be sure to wear protective gloves while sanding to avoid skin irritation.
Priming the Surface
After sanding, you should apply a primer to the rim. This will help the paint adhere better and last longer. Apply a thin coat of primer, making sure to cover all areas of the rim. Let the primer dry completely before moving on to the next step.
Painting
Now that the surface is prepped, it’s time to start painting. Here’s how to do it.
Choosing the Right Paint
When it comes to painting aluminum rims, you want to make sure you choose the right type of paint. Look for a paint that is specifically designed for aluminum surfaces. This will help ensure that the paint adheres properly and won’t chip or peel over time.
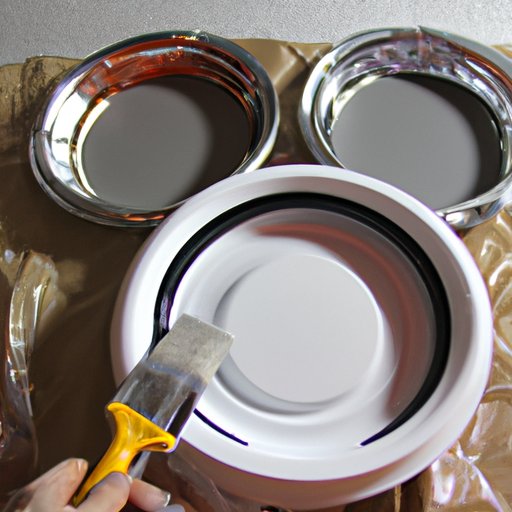
Applying the Paint
Once you’ve chosen the right paint, it’s time to apply it. Start by shaking the can well, then hold it about six inches away from the rim and spray in a steady back-and-forth motion. Make sure to cover all areas of the rim evenly, and apply thin coats rather than thick ones. Allow the paint to dry completely between coats.
Finishing Touches
Once you’ve applied the desired number of coats, you can add some finishing touches. You can add stripes or other designs to the rims if you wish. You may also want to apply a clearcoat to protect the paint and help it last longer.
DIY Tutorial: How to Paint Aluminum Wheels
If you’d like to try painting aluminum rims yourself, here’s a quick tutorial to help you get started.
Materials Needed
To paint aluminum rims, you’ll need the following materials:
- Degreaser
- Soap and water
- Scrub brush
- Fine-grit sandpaper
- Primer
- Paint designed for aluminum surfaces
- Clearcoat (optional)
Steps Involved
Follow these steps to paint aluminum rims:
- Clean the surface of the rim with a degreaser and a scrub brush.
- Sand the surface with fine-grit sandpaper.
- Apply a thin coat of primer to the rim.
- Shake the can of paint well, then hold it six inches away from the rim and spray in a steady back-and-forth motion.
- Allow the paint to dry completely between coats.
- Add any finishing touches, such as stripes or other designs.
- Apply a clearcoat to protect the paint and help it last longer.

Tips and Tricks for Painting Your Aluminum Rims
When painting aluminum rims, there are a few tips and tricks that can help you achieve the best results possible. Here are a few of them.
Consider the Type of Paint
Make sure to choose a paint specifically designed for aluminum surfaces. This will help ensure that the paint adheres properly and won’t chip or peel over time.
Take Time with Prepping
Surface preparation is key to achieving a good result when painting aluminum rims. Make sure to clean and sand the surface thoroughly before applying the primer and paint.
Apply Thin Coats
When applying the paint, make sure to use thin coats rather than thick ones. This will help ensure that the paint adheres properly and won’t run or drip.
Use a Clearcoat
Once you’ve applied the desired number of coats, consider applying a clearcoat to protect the paint and help it last longer.

How to Achieve a Professional Look When Painting Aluminum Rims
If you want your aluminum rims to look like they were painted by a professional, follow these tips.
Choose Quality Paint
When selecting paint for your aluminum rims, choose a high-quality product. Cheap paint won’t last as long and may not have the same level of coverage.
Follow Directions Carefully
Read the instructions on the paint can carefully and follow them exactly. This will help ensure that the paint adheres properly and gives you the best results possible.
Allow Sufficient Drying Time
Be sure to allow enough time for the paint to dry between coats. This will help ensure that the paint adheres properly and won’t run or drip.
A Beginner’s Guide to Painting Aluminum Rims
Painting aluminum rims can seem intimidating, but it doesn’t have to be. With the right supplies and a little bit of patience, anyone can do it. Here’s a beginner’s guide to help you get started.
Gather Supplies
Make sure you have all the supplies you need before you start. You’ll need a degreaser, soap and water, a scrub brush, fine-grit sandpaper, primer, paint, and a clearcoat (optional).
Prepare the Surface
Start by cleaning the surface of the rim with a degreaser and a scrub brush. Then sand the surface with fine-grit sandpaper. Finally, apply a thin coat of primer to the rim.
Paint the Rims
Once the surface is prepped, you can start painting. Shake the can of paint well, then hold it six inches away from the rim and spray in a steady back-and-forth motion. Make sure to apply thin coats and allow the paint to dry completely between coats.
Protect the Finish
Once you’ve finished painting, consider applying a clearcoat to protect the paint and help it last longer.
Conclusion
Painting aluminum rims is a great way to give your car a fresh look. With the right supplies and a little bit of patience, anyone can do it. Follow the steps outlined in this article to prepare the surface and apply the paint, and use the tips and tricks for achieving a professional finish. Good luck!
Summary
Painting aluminum rims can give your car a new look. This article provided a step-by-step guide to painting aluminum rims, along with tips and tricks for achieving a professional finish. Gather the necessary supplies and follow the steps outlined in this article to get started.
Additional Resources
For more information on painting aluminum rims, check out the following resources: