
Introduction
Aluminum soffit is a type of siding material used to cover the underside of the roof’s overhang. It is an attractive and durable choice for protecting your home from the elements. Installing aluminum soffit can seem intimidating, but with the right tools and techniques, it is possible to do it yourself. This article will provide a comprehensive guide to help you install aluminum soffit with confidence.
What is Aluminum Soffit?
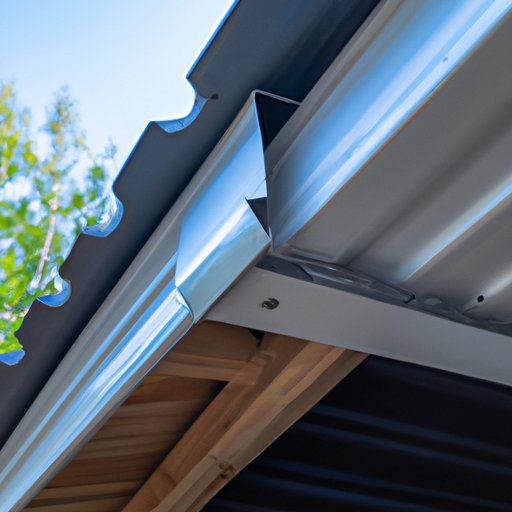
Aluminum soffit is a type of siding material made of aluminum or vinyl that is used to cover the underside of the roof’s overhang. It helps protect your home from the elements, while also providing an attractive look. Aluminum soffit is available in a variety of colors and styles to suit any home’s exterior design. It is also a low-maintenance option that does not require painting or staining.

Benefits of Installing Aluminum Soffit
Installing aluminum soffit offers many benefits, including protection from the elements, improved ventilation, and added aesthetic appeal. It also helps prevent moisture buildup in your attic and prevents pests from entering your home. Additionally, aluminum soffit is easy to maintain and has a long lifespan.
Step-by-Step Guide to Installing Aluminum Soffit
Installing aluminum soffit involves several steps. Here is a step-by-step guide to help you get started:
1. Preparing the Area
The first step is to prepare the area where you will be installing the aluminum soffit. This includes removing any existing siding, cleaning the surface, and making sure there are no gaps or holes. You may also need to repair any damaged wood before beginning the installation process.
2. Measuring and Cutting the Soffit Sections
Once the area is prepared, measure and cut the sections of aluminum soffit to fit. Make sure to use a saw with a fine-toothed blade to ensure a clean, straight cut. It is important to double-check your measurements before cutting to ensure accuracy.
3. Installing the Soffit Panels
Next, you will need to install the soffit panels. Start by placing the first panel at the bottom of the wall, then work your way up the wall. Make sure to secure each panel with nails or screws to ensure they stay in place.
4. Securing the Soffit Panels
Once all the panels are in place, you will need to secure them with nails or screws. Make sure to use the appropriate size and type of fasteners for the job. Also, make sure to avoid overdriving the fasteners, as this can cause damage to the soffit.
DIY Tips for Installing Aluminum Soffit
Installing aluminum soffit can be a daunting task, but there are some helpful tips to keep in mind when tackling this project. Here are a few DIY tips to help you get started:
1. Selecting the Right Tools
It is important to have the right tools for the job. Make sure you have a tape measure, a level, a hammer, and a saw with a fine-toothed blade. You may also want to invest in a power drill for drilling holes into the soffit.
2. Making Sure You Have All the Necessary Materials
Before starting the installation process, make sure you have all the necessary materials on hand. This includes the aluminum soffit, fasteners, and any other materials needed for the job. Having everything you need before you start will save you time and energy in the long run.
3. Taking Safety Precautions
It is important to take safety precautions when installing aluminum soffit. Make sure to wear protective gloves and eyewear, and use a ladder safely. Also, be aware of your surroundings and don’t overexert yourself.
How to Install Aluminum Soffit in a Few Simple Steps
Installing aluminum soffit is a relatively straightforward process that can be done in just a few simple steps. Here is a quick overview of how to install aluminum soffit:
1. Marking the Soffit Sections
Start by measuring and marking the soffit sections with a pencil or marker. Make sure to double-check your measurements to ensure accuracy.
2. Drilling the Holes
Once the sections are marked, you will need to drill holes for the fasteners. Make sure to use a drill bit that is the same size as the fasteners you are using.
3. Securing the Soffit Panels
After drilling the holes, secure the soffit panels in place with nails or screws. Make sure to drive the fasteners in securely, but not too tightly, to avoid damaging the material.

A Comprehensive Guide to Installing Aluminum Soffit
Installing aluminum soffit requires a few essential steps. Here is a comprehensive guide to help you get started:
1. Understanding the Different Types of Soffit
Aluminum soffit is available in a variety of styles, including vented, non-vented, solid, and perforated. It is important to understand the differences between these types of soffit before beginning the installation process.
2. Choosing the Right Size of Soffit Panel
The next step is to select the right size of soffit panel for your project. Make sure to measure the area accurately and choose a panel that fits snugly against the wall.
3. Installing the Fascia Boards
Fascia boards are typically installed after the soffit panels. The fascia boards provide additional support and help protect the edges of the soffit from the elements. Make sure to measure and cut the fascia boards accurately before installing them.

Essential Tools and Techniques for Installing Aluminum Soffit
In addition to the steps outlined above, there are a few essential tools and techniques you should keep in mind when installing aluminum soffit. Here are a few tips to help you get started:
1. Using a Ladder Safely
When working on a ladder, make sure to use it safely. Always check that the ladder is stable and secure before climbing, and never stand on the top two rungs. Additionally, avoid reaching out too far while on the ladder, as this can cause it to become unstable.
2. Choosing the Right Nails and Screws
Make sure to choose the right nails and screws for the job. Use galvanized or stainless steel nails or screws that are rated for outdoor use. Additionally, make sure to use nails or screws that are the same size as the drill bit you are using.
3. Installing the Vents and Trim Pieces
Finally, you will need to install the vents and trim pieces. Make sure to measure and cut the pieces accurately before installing them. Additionally, make sure to use the appropriate sealant around the edges of the vents to ensure a tight seal.
Conclusion
Installing aluminum soffit can seem intimidating, but with the right tools and techniques, it can be done with relative ease. This comprehensive guide provides step-by-step instructions, DIY tips and essential tools and techniques for installing aluminum soffit. With this information, you can confidently tackle this project and enjoy the benefits of having aluminum soffit installed in your home.