
Introduction
Cracks can occur in aluminum for many reasons, including corrosion, stress fractures, or even something as simple as an accidental drop or impact. Regardless of the cause, it is important to repair the crack as soon as possible, not only to restore the aesthetic appeal of the object, but also to prevent further damage from occurring. Fortunately, there are several different methods available to fix a crack in aluminum.
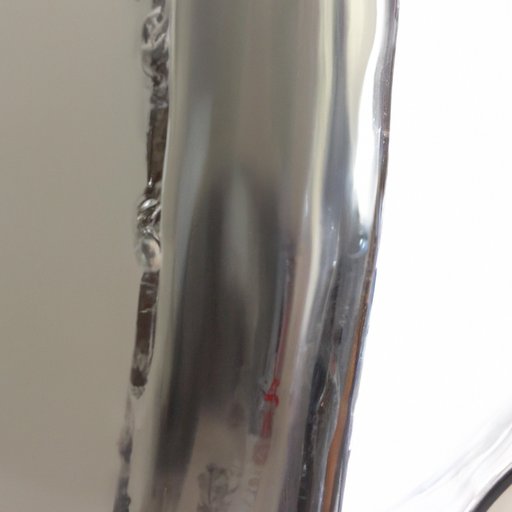
Overview of the Problem
When dealing with cracked aluminum, it is important to take into account the size and shape of the crack. Smaller cracks may be able to be fixed with just adhesive or putty, while larger cracks may require more involved procedures such as welding. Additionally, the location of the crack will determine the best method of repair. For example, if the crack is located on a structural component, welding may be the best option. It is also important to note any signs of corrosion around the crack, as this can affect the type of repair that should be used.
Benefits of Fixing the Crack
The main benefit of fixing a crack in aluminum is to prevent further damage or deterioration of the object. If left unrepaired, the crack can worsen over time, leading to weakening of the structure and potential collapse. Additionally, fixing the crack can help improve the overall look of the object. A repaired crack can look almost as good as new, restoring the original aesthetics.

Using a Soldering Iron to Seal the Crack
For small, shallow cracks, a soldering iron can be used to seal the crack. This method is relatively quick and easy, and does not require any specialized tools or materials. To begin, gather together the following items: a soldering iron, flux, solder, and aluminum oxide sandpaper.
Step-by-Step Process
- Clean the area around the crack with the aluminum oxide sandpaper to remove any dirt or debris.
- Apply flux to the crack, taking care to ensure that the entire area is covered.
- Heat the flux with the soldering iron until it begins to bubble.
- Once the flux is bubbling, apply the solder to the crack until it has been completely filled.
- Allow the solder to cool before handling the object.
Potential Risks/Considerations
When using a soldering iron to fix a crack, it is important to take proper precautions for safety. The soldering iron can reach temperatures of up to 500 degrees Celsius, so it is important to wear protective gloves and eyewear. Additionally, it is important to ensure that the object is not heated too much, as this could lead to further damage.

Applying Aluminum Putty to the Cracked Area
Aluminum putty can be used to fill in small cracks, and can be applied quickly and easily. To begin, gather the following items: aluminum putty, masking tape, and a putty knife.
Step-by-Step Process
- Clean the area around the crack with a damp cloth to remove any dirt or debris.
- Apply a thin layer of aluminum putty to the crack with the putty knife.
- Use masking tape to hold the putty in place.
- Allow the putty to dry for at least 24 hours before handling the object.
Potential Risks/Considerations
When using aluminum putty to fix a crack, it is important to take proper precautions. The putty can contain toxic chemicals, so it is important to wear gloves and a respirator when applying it. Additionally, it is important to ensure that the putty is applied evenly and in a thin layer, as this will ensure that it adheres properly.
Fixing the Crack with Aluminum Tape
Aluminum tape can be used to patch small cracks in aluminum objects. To begin, gather the following items: aluminum tape, scissors, and a utility knife.
Step-by-Step Process
- Clean the area around the crack with a damp cloth to remove any dirt or debris.
- Cut a piece of aluminum tape slightly larger than the crack.
- Use the utility knife to score the tape along the edges of the crack.
- Press the tape firmly onto the crack and smooth out any air bubbles.
- Allow the tape to adhere for at least 24 hours before handling the object.
Potential Risks/Considerations
When using aluminum tape to fix a crack, it is important to ensure that the tape is applied correctly. If the tape is not applied evenly or is not securely adhered to the object, it may not provide the desired protection. Additionally, the tape should be checked periodically to ensure that it is still securely in place.
Filling the Crack with Epoxy
Epoxy can be used to fill deep cracks in aluminum objects. To begin, gather the following items: epoxy, mixing cups, stir sticks, and gloves.
Step-by-Step Process
- Clean the area around the crack with a damp cloth to remove any dirt or debris.
- Mix the epoxy in the mixing cup according to the manufacturer’s instructions.
- Use the stir stick to mix the epoxy thoroughly.
- Wearing gloves, apply the epoxy to the crack.
- Allow the epoxy to cure for at least 24 hours before handling the object.
Potential Risks/Considerations
When using epoxy to fix a crack, it is important to take proper precautions. The epoxy can contain toxic chemicals, so it is important to wear gloves and a respirator when applying it. Additionally, it is important to ensure that the epoxy is mixed thoroughly and applied evenly, as this will ensure that it adheres properly.
Welding the Crack Closed
For larger or deeper cracks, welding may be the best option. To begin, gather the following items: welding equipment, safety gear, and a welding rod.
Step-by-Step Process
- Clean the area around the crack with a damp cloth to remove any dirt or debris.
- Set up the welding equipment according to the manufacturer’s instructions.
- Put on safety gear, including goggles, gloves, and a welding helmet.
- Start the welding process and slowly move the welding rod along the length of the crack.
- Allow the weld to cool before handling the object.
Potential Risks/Considerations
When welding a crack, it is important to take proper precautions for safety. The welding process can reach temperatures of up to 3000 degrees Celsius, so it is important to wear protective gear at all times. Additionally, it is important to ensure that the object is not overheated, as this could lead to further damage.
Conclusion
In conclusion, there are several different methods available to fix a crack in aluminum. These methods include using a soldering iron, applying aluminum putty, using aluminum tape, filling the crack with epoxy, and welding the crack closed. Each method has its own benefits and considerations, so it is important to choose the one that best suits the size and location of the crack. With the right tools and knowledge, you can easily fix a crack in aluminum and restore it to its original condition.

Summary of What Was Covered
This article explored how to fix a crack in aluminum by using various methods such as soldering, applying putty, using tape, epoxy and welding. We discussed the step-by-step process and potential risks/considerations of each method. By following these steps and taking proper precautions, you can easily fix a crack in aluminum and restore it to its original condition.
Final Thoughts and Considerations
When dealing with a cracked aluminum object, it is important to assess the size and location of the crack to determine the best method of repair. Additionally, it is important to take proper safety precautions when using any of the methods outlined in this article. With the right tools and knowledge, you can easily fix a crack in aluminum and restore it to its original condition.