
Introduction
Etching aluminum is a fun and creative way to add unique designs to your projects. It involves the use of an etching solution that reacts with the surface of the aluminum to create a permanent design. The process can be used on many different types of aluminum surfaces, from plates and jewelry to large-scale architectural elements.
This article will provide a step-by-step guide to etching aluminum, as well as important safety precautions, tips for improving results, and creative ways to take your design to the next level. We’ll also discuss the basics of etching aluminum for beginners and some expert tips and tricks for achieving professional results.
Step-by-Step Guide to Etching Aluminum
Etching aluminum is a relatively simple process, but it does require some preparation and a few specialized materials. Here’s a step-by-step guide to get you started:
Gathering the Necessary Materials
Before you begin, you’ll need to gather the necessary materials. These include protective clothing (such as gloves and a face mask), etching solution, a brush, and the aluminum surface you wish to etch. You may also need a few other items depending on the complexity of your design, such as stencils, rubbing plates, or other tools.
Preparing the Surface for Etching
Once you have all the materials ready, you’ll need to prepare the aluminum surface for etching. This involves ensuring the surface is clean and free of dirt, dust, and debris. You may also want to sand the surface for a smoother finish.
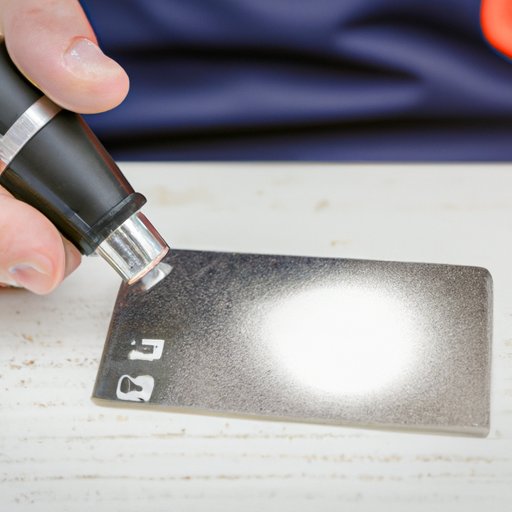
Applying the Etching Solution
The next step is to apply the etching solution to the aluminum surface. Depending on the type of etching solution you’re using, this can be done by brushing it on or spraying it from a can. Make sure to follow the manufacturer’s instructions carefully.
Drying and Finishing Steps
After the etching solution has been applied, it’s time to dry and finish the aluminum surface. This can be done by simply allowing the solution to air dry, or you can use a hairdryer or heat gun to speed up the process. Once the surface is dry, you can apply any additional finishes, such as paint or sealant, to protect the design.

DIY Etching Aluminum: What You Need to Know
Etching aluminum is a relatively straightforward process, but there are a few important safety considerations and techniques to keep in mind. Here are some tips for achieving successful results with etching aluminum:
Safety Precautions
When working with etching solutions, it’s important to take proper safety precautions. Make sure to wear protective clothing, such as gloves and a face mask, and work in a well-ventilated area. Also, be sure to read the manufacturer’s instructions and safety warnings before starting.
Tips for Improving Results
To achieve the best possible results with etching aluminum, it’s important to take your time and plan ahead. Make sure to thoroughly clean the aluminum surface before beginning, and consider using stencils or rubbing plates to achieve more intricate designs. Finally, make sure to allow plenty of time for the etching solution to dry completely before applying any additional finishes.
Troubleshooting Common Problems
If you encounter any problems while etching aluminum, there are a few things you can do. If the etching solution isn’t reacting properly, try using a different type of etching solution. If the design isn’t coming out as expected, try using a different technique, such as using a rubbing plate or stencil. If all else fails, don’t be afraid to start over and try again.
Creative Ways to Etch Aluminum for a Unique Look
Etching aluminum can be used to create a wide range of unique and creative designs. Here are some ideas for taking your etching to the next level:
Using Stencils and Rubbing Plates
Using stencils and rubbing plates is a great way to create intricate and detailed designs. Simply cut a stencil from a piece of paper or plastic, or use a rubbing plate to transfer a design onto the aluminum surface. Then, apply the etching solution and let it dry.
Combining Different Colors
Adding color to your etching can really bring your design to life. Try combining different colors of etching solution, or use paint or markers to add color after the etching is complete.
Adding Text or Images
You can also use etching to add text or images to your aluminum surface. Use a stencil or rubbing plate to transfer a design onto the surface, then apply the etching solution. For text, you can also use a computer program to create a custom design.

How to Achieve Professional Results with Etching Aluminum
If you’re looking to achieve professional results with etching aluminum, there are a few things you should keep in mind. Here are some tips for getting the best possible results:
Choosing the Right Equipment
It’s important to choose the right equipment for etching aluminum. Make sure to select an etching solution that is specifically designed for aluminum, as other solutions may not produce satisfactory results. Also, be sure to use a brush or spray bottle that is designed for etching.
Maintaining Quality Control
When etching aluminum, it’s important to maintain quality control throughout the process. Make sure to check the etching solution regularly to ensure it is still effective, and apply multiple coats of etching solution if needed. Also, be sure to inspect the aluminum surface after each step to ensure the etching is progressing as expected.
Following Best Practices
Finally, it’s important to follow best practices when etching aluminum. Make sure to wear protective clothing, work in a well-ventilated area, and follow the manufacturer’s instructions carefully. Also, be sure to allow plenty of time for the etching solution to dry completely before applying any additional finishes.

The Basics of Etching Aluminum for Beginners
If you’re new to etching aluminum, it’s important to understand the basics of the process. Here are some tips for mastering the technique:
Understanding the Process
Before you begin, it’s important to understand the basics of the etching process. Make sure to read the manufacturer’s instructions carefully and familiarize yourself with the safety precautions. Also, make sure to prepare the aluminum surface properly before beginning.
Mastering the Technique
Once you understand the basics, it’s time to practice the technique. Start with a simple design and gradually increase the complexity as you become more comfortable with the process. Don’t be afraid to experiment with different techniques, such as using stencils or rubbing plates.
Working on Different Surfaces
Finally, it’s important to practice etching on different types of aluminum surfaces. This will help you develop the skills necessary to etch larger or more complex pieces, such as plates or jewelry. Be sure to practice on scrap pieces of aluminum before moving on to your final project.
Tips and Tricks for Etching Aluminum Like an Expert
Once you’ve mastered the basics of etching aluminum, there are a few tips and tricks that can help you achieve professional results. Here are some ideas for taking your etching to the next level:
Experimenting with Different Materials
Experimenting with different materials can help you create unique and interesting designs. Try using different colors of etching solution, or use paint or markers to add color and texture to your design. You can also combine different materials, such as wood and aluminum, to create a truly one-of-a-kind look.
Enhancing the Design with Color
Adding color to your etching can really bring your design to life. Try combining different colors of etching solution, or use paint or markers to add color after the etching is complete. You can also use colored papers or fabric to create interesting effects.
Protecting the Aluminum Surface
Finally, it’s important to protect the aluminum surface once you’ve finished etching. Apply a sealant or clear coat to protect the design and prevent it from fading or wearing away over time. This will also help keep the aluminum from corroding.
Conclusion
Etching aluminum is a great way to add unique designs to your projects. This guide has provided a step-by-step guide to etching aluminum, as well as important safety precautions, tips for improving results, and creative ways to take your design to the next level. Additionally, we’ve discussed the basics of etching aluminum for beginners, as well as some tips and tricks for achieving professional results.
With the right materials and a bit of practice, you can create beautiful and unique designs with etching aluminum. So get creative, have fun, and start etching!
Resources for Further Learning:
- How to Etch Metal: A Comprehensive Guide – https://www.wikihow.com/Etch-Metal
- Etching Aluminum: Tips and Techniques – http://www.doityourself.com/stry/etching-aluminum-tips-and-techniques
- DIY Etching Tutorial – https://www.instructables.com/id/DIY-Etching/
- How to Etch Aluminum – https://www.youtube.