
Introduction
Soldering is a technique used to join two pieces of metal together by melting a filler material between them. It’s a common method for creating electrical connections and for repairing or reinforcing metal parts. Soldering aluminum, however, is different from soldering other metals because of its unique properties and characteristics.

Exploring the Basics of Soldering Aluminum: A Comprehensive Guide
Before you start soldering aluminum, it’s important to understand the different types of aluminum and what tools and materials are required for the job. Here’s a quick overview of the process of soldering aluminum.
Understanding Different Types of Aluminum
Aluminum comes in a variety of alloys, each with its own set of characteristics and properties. The most common type of aluminum is 1000 series aluminum, which is generally considered to be the easiest to solder. Other types of aluminum, such as 2000 and 7000 series, require higher temperatures and more specialized techniques.
What Tools and Materials are Needed for Soldering Aluminum?
In addition to a soldering iron, a few other tools and materials are needed to successfully solder aluminum. These include flux, solder, and a heat source such as a torch or hot air gun. You’ll also need a cleaning solution, like alcohol or vinegar, to clean the aluminum before soldering.
Overview of the Process of Soldering Aluminum
The process of soldering aluminum involves several steps. First, the aluminum must be prepped by cleaning and heating it. Then, flux and solder are applied to the heated aluminum. Finally, the solder is cooled, and the joint is finished up.
Soldering Aluminum: What You Need to Know and How to Do It Right
Soldering aluminum is not as simple as soldering other metals. To ensure that your project is successful, it’s important to understand what you’re doing and how to do it correctly.
Preparing the Aluminum for Soldering
Before soldering, it’s important to prepare the aluminum by cleaning it with a cleaning solution. This will remove any dirt or oxidation that could interfere with the soldering process. Additionally, the aluminum needs to be heated to the proper temperature for soldering.
Heating the Aluminum for Soldering
Once the aluminum is prepped, it needs to be heated to the proper temperature for soldering. This temperature will vary depending on the type of aluminum being soldered. For example, 1000 series aluminum typically requires a temperature of around 400°F, while 7000 series aluminum requires temperatures closer to 600°F.
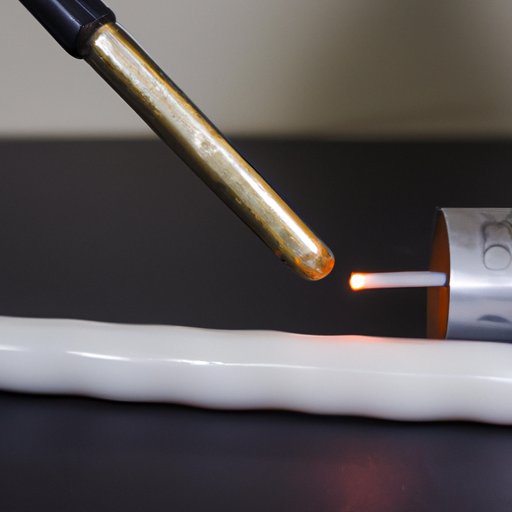
Applying Flux and Solder to the Aluminum
Once the aluminum is heated, flux and solder should be applied to the joint. The flux serves to clean the joint and help the solder flow freely. The solder should then be applied, and the joint should be allowed to cool before moving on to the next step.
Finishing Up the Soldering Process
After the solder has cooled, the joint should be inspected for any defects. If necessary, additional flux and solder can be applied to fix any issues. Once all defects have been addressed, the joint should be cleaned again and the project is complete.
A Beginner’s Guide to Soldering Aluminum for Your Home Projects
Soldering aluminum can be intimidating for those who are just starting out. Here are some tips for getting started with soldering aluminum and considerations when working with aluminum.
Tips for Getting Started with Soldering Aluminum
When beginning to solder aluminum, it’s important to use the right tools and materials. Make sure to use flux specifically designed for aluminum and choose a solder that is compatible with the type of aluminum being worked with. Additionally, practice soldering on scrap pieces of aluminum before attempting to solder your project pieces.
Considerations When Working with Aluminum
Soldering aluminum requires higher temperatures than other metals, so it’s important to take extra care when working with it. Use caution when handling the heated aluminum, as it can become very hot. Additionally, it’s important to use the right tools and materials for the job and to follow the instructions carefully.
Troubleshooting Common Issues
If you’re having trouble soldering aluminum, there are a few things you can do. Make sure you’re using the right type of flux and solder, and that the aluminum has been properly prepped and heated. If you continue to have issues, consider consulting a professional or taking a soldering class.

How to Avoid Common Mistakes When Soldering Aluminum
To ensure success when soldering aluminum, it’s important to avoid common mistakes. Here are three key tips for avoiding mistakes when soldering aluminum.
Cleaning the Aluminum Before Soldering
It’s essential to clean the aluminum before soldering. Dirt and oxidation on the surface of the aluminum can interfere with the soldering process, resulting in weak joints and potential failure. Cleaning the aluminum with a cleaning solution before soldering will ensure a strong bond.
Using the Proper Soldering Temperature
Using the wrong soldering temperature can lead to problems such as poor wetting of the solder or failed joints. It’s important to use the proper temperature for the type of aluminum being soldered. If in doubt, consult a professional or take a soldering class.
Choosing the Right Type of Flux
Different types of flux are designed for different types of metals. It’s important to use flux specifically designed for aluminum, as other types of flux may not provide adequate protection or may react negatively with the aluminum. Be sure to read the instructions carefully before applying the flux.
Soldering Aluminum 101: A Step-by-Step Guide to Successfully Joining Metals
Now that you understand the basics of soldering aluminum, here’s a step-by-step guide to help you get started.
Step 1: Prepare the Aluminum
Before soldering, it’s important to prepare the aluminum by cleaning it with a cleaning solution and heating it to the proper temperature. This will help ensure the best results.
Step 2: Heat the Aluminum
Once the aluminum is prepped, it needs to be heated to the proper temperature for soldering. This temperature will vary depending on the type of aluminum being soldered.
Step 3: Apply Flux and Solder
Once the aluminum is heated, flux and solder should be applied to the joint. The flux helps to clean the joint and facilitate the flow of the solder. Then, the solder should be applied to the joint.
Step 4: Finishing Up
Once the solder has cooled, the joint should be inspected for any defects. If necessary, additional flux and solder can be applied to fix any issues. Once all defects have been addressed, the joint should be cleaned again and the project is complete.
Conclusion
Soldering aluminum can be tricky, but with the right tools and techniques, it’s possible to achieve great results. By following this comprehensive guide and taking the time to understand the basics of soldering aluminum, you can successfully join metals for your home projects.