
Introduction
Aluminum siding is a popular choice for many homeowners due to its low maintenance, durability, and affordability. However, even with proper care, aluminum siding can suffer from wear and tear over time. When this happens, it’s important to know how to repair it properly to prevent further damage. In this article, we’ll provide an overview of aluminum siding repair, a step-by-step guide to repairing aluminum siding, common causes of damage and how to fix them, tips for protecting your aluminum siding from future damage, a cost comparison between professional and DIY repair, and how to choose the right aluminum siding repair contractor.

Overview of Aluminum Siding Repair
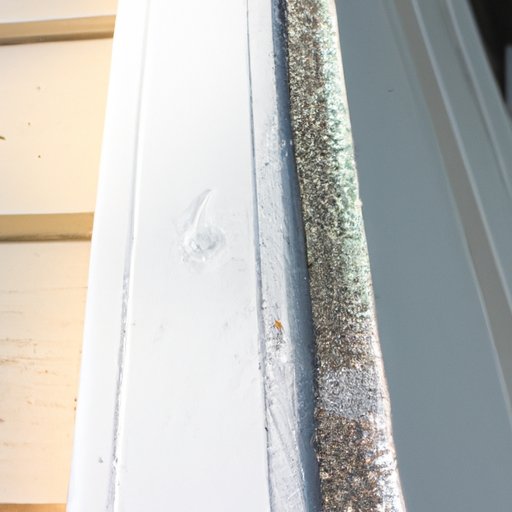
Aluminum siding is a durable and affordable material that is often used to protect homes from the elements. It is lightweight, easy to install, and available in a variety of colors and styles. However, like any other type of siding, aluminum siding can become damaged over time due to weather, age, and other external factors. When this happens, it’s important to know how to repair it properly to prevent further damage.
Step-by-Step Guide to Repairing Aluminum Siding
Repairing aluminum siding can be a complicated process, but with the right materials and tools, it can be done relatively quickly. Here is a step-by-step guide to repairing aluminum siding:
Gather Materials and Tools
The first step in repairing aluminum siding is to gather the necessary materials and tools. You will need aluminum siding panels, screws or nails, caulk, sealant, and a caulking gun. You may also need a power drill, hammer, pry bar, and utility knife. Make sure you have all the materials and tools on hand before you begin the repair process.
Remove Damaged Sections
Once you have gathered the necessary materials and tools, the next step is to remove the damaged sections. Use a pry bar or utility knife to carefully remove the damaged sections. Be sure to wear safety glasses when removing the sections to avoid injury. Once the sections are removed, discard them.
Prepare the Area for Installation
After the damaged sections have been removed, the area must be prepared for installation. Use a hammer to flatten any bent areas and make sure the area is clean and free of debris. If there are any gaps or cracks, use caulk and sealant to fill them in and create a smooth surface.
Install New Sections
Once the area is prepared, the new sections can be installed. Use a power drill to attach the new panels to the wall. Use screws or nails to secure the panels in place and make sure they are firmly attached. Once the panels are in place, use caulk and sealant to fill in any gaps and ensure a tight fit.
Common Causes of Damage to Aluminum Siding and How to Fix Them
Damage to aluminum siding can be caused by a variety of factors, including wind, hail, and moisture. Here are some common causes of damage and how to fix them:
Wind Damage
High winds can cause aluminum siding to become loose or detached. To fix this issue, use a power drill to secure the panels back into place. Make sure the panels are firmly attached and use caulk and sealant to fill in any gaps.
Hail Damage
Hail can cause dents and scratches in aluminum siding. To repair hail damage, use a putty knife to fill in the dents and scratches with a matching color of putty. Once the putty has dried, sand it down to create a smooth finish.
Moisture Damage
Moisture damage is one of the most common types of damage to aluminum siding. To repair moisture damage, use a putty knife to fill in any cracks or holes with a matching color of putty. Once the putty has dried, sand it down to create a smooth finish.
Tips for Protecting Your Aluminum Siding from Future Damage
In addition to repairing existing damage, there are several steps you can take to protect your aluminum siding from future damage. Here are some tips for protecting your aluminum siding:
Check for Loose Panels Regularly
Checking for loose panels regularly is one of the best ways to prevent damage to your aluminum siding. Use a power drill to secure any loose panels and use caulk and sealant to fill in any gaps.
Clean Your Siding Regularly
Cleaning your siding regularly is important for maintaining its appearance and preventing damage. Use a soft cloth and mild detergent to gently clean your siding. Avoid using harsh chemicals or abrasives as these can cause damage.
Inspect Your Gutters
Clogged gutters can cause water to pool around the foundation of your home, which can lead to moisture damage to your siding. Inspect your gutters regularly and clean them out as needed to prevent water damage.

Cost Comparison: Professional vs DIY Aluminum Siding Repair
When it comes to repairing aluminum siding, it’s important to consider both the cost of professional repair and the cost of DIY repair. Here is a cost comparison between professional and DIY aluminum siding repair:
Costs of Professional Repair
The cost of professional aluminum siding repair can vary depending on the extent of the damage and the size of the area that needs to be repaired. Generally, professional repair costs start at around $1,000 and can go up from there. This cost includes labor, materials, and any additional services required for the repair.
Costs of DIY Repair
DIY aluminum siding repair can be significantly less expensive than professional repair. The cost of materials and tools for DIY repair is typically around $100 or less. In addition, you will save money on labor costs since you will be doing the work yourself. However, it is important to keep in mind that DIY repairs can be time consuming and require a certain level of skill.

How to Choose the Right Aluminum Siding Repair Contractor
If you decide to hire a professional to repair your aluminum siding, it’s important to choose the right contractor. Here are some tips for choosing the right aluminum siding repair contractor:
Get Multiple Estimates
Before hiring a contractor, it’s a good idea to get multiple estimates. This will give you a better understanding of the cost of the repair and allow you to compare prices from different contractors.
Research Contractors
Once you have received multiple estimates, do some research on the contractors. Read reviews, check references, and make sure the contractor is licensed and insured.
Ask for References
It’s also a good idea to ask the contractors for references. Contacting previous customers is a great way to get an honest opinion of the contractor’s work.
Conclusion
Aluminum siding repair is a necessary task for many homeowners. Knowing how to repair aluminum siding, common causes of damage, and tips for protection can help you keep your aluminum siding in good condition. Additionally, it’s important to understand the cost of professional and DIY repairs and how to choose the right contractor for the job. With the right knowledge and preparation, you can keep your aluminum siding looking great for years to come.