
Introduction
Leaking boats can be a major problem, especially if they are made of aluminum due to its propensity to corrode. Fortunately, with the right tools and techniques, it is possible to fix aluminum boat leaks. This article will provide an overview of the process, from inspecting the hull for signs of damage to adjusting the boat trim for optimal performance.
Inspecting the Hull for Signs of Damage
The first step in fixing aluminum boat leaks is to inspect the hull for any cracks or holes. This can be done using a flashlight and mirror to check for any visible signs of damage. It is important to look closely, as even small cracks or holes can cause significant leaks.
Once any cracks or holes have been identified, the next step is to assess the severity of the damage. If the damage is minor, such as a hairline crack, then it may be possible to repair it without replacing the entire plate. However, if the damage is more severe, such as a large hole, then it will likely be necessary to replace the affected plate.
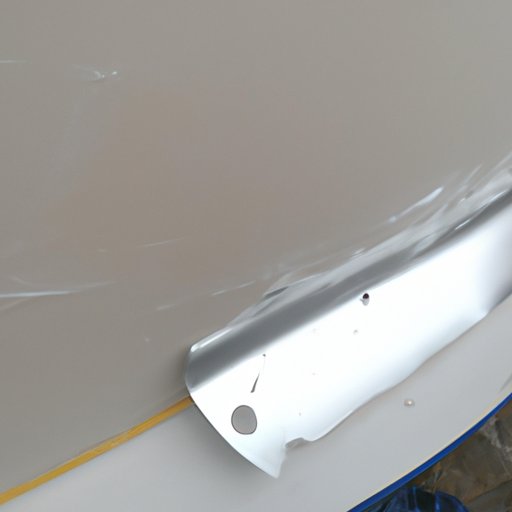
Replacing Damaged Plates
If it is determined that a plate needs to be replaced, then the next step is to find an appropriate replacement part. The best place to start is by consulting the manufacturer’s specifications for the boat, as this will provide the exact measurements and other details needed to purchase the correct part. Once the part has been acquired, it can then be installed according to the manufacturer’s instructions.
Resealing Seams and Joints
In addition to replacing damaged plates, it is also important to reseal any seams or joints in the hull. This can be done by first preparing the surface, which involves cleaning it with a stiff brush and removing any old sealant or corrosion. Once the surface is clean, the next step is to apply a high-quality sealant to ensure a watertight seal.
Using a Sealant Compound
Another option for fixing aluminum boat leaks is to use a sealant compound. This type of product can be applied directly to the affected area and will form a waterproof barrier that will prevent further leaks. When choosing a sealant, it is important to select one that is specifically designed for aluminum, as this will ensure the best results.
Applying a Protective Coating
After the sealant has been applied, the next step is to apply a protective coating to the hull. This will help to protect the metal from further corrosion and also improve its overall appearance. When selecting a coating, it is important to choose one that is specifically designed for aluminum, as this will ensure the best results.
Re-Caulking Around Fasteners
Finally, it is important to re-caulk any fasteners that are located on the hull. This will help to ensure a watertight seal and also prevent any further leaks. To do this, the old caulk should be removed and then replaced with a high-quality caulk that is specifically designed for aluminum.

Analyzing and Adjusting the Boat Trim
To ensure optimal performance, it is also important to analyze and adjust the boat’s trim. This involves checking for proper balance and making any necessary adjustments. This will help to reduce drag and improve the overall efficiency of the boat.
Conclusion
In conclusion, fixing aluminum boat leaks can be a challenging but rewarding task. By following the steps outlined above, it is possible to identify and repair any cracks or holes in the hull, reseal seams and joints, apply a sealant compound, apply a protective coating, and adjust the boat trim for optimal performance. With patience and care, it is possible to make sure that your boat stays watertight and performs at its best.